To properly clean hiking boots before waterproofing, you must first dislodge all surface-level debris and then perform a deep clean using water and a specialized cleaner. This two-stage process ensures the waterproofing treatment can bond directly and effectively with the boot's material, rather than being blocked by a hidden layer of fine dirt.
The goal of cleaning is not just to make your boots look good, but to open up the material's "pores." A truly clean boot will absorb waterproofing treatments evenly and effectively, maximizing protection and extending its lifespan.
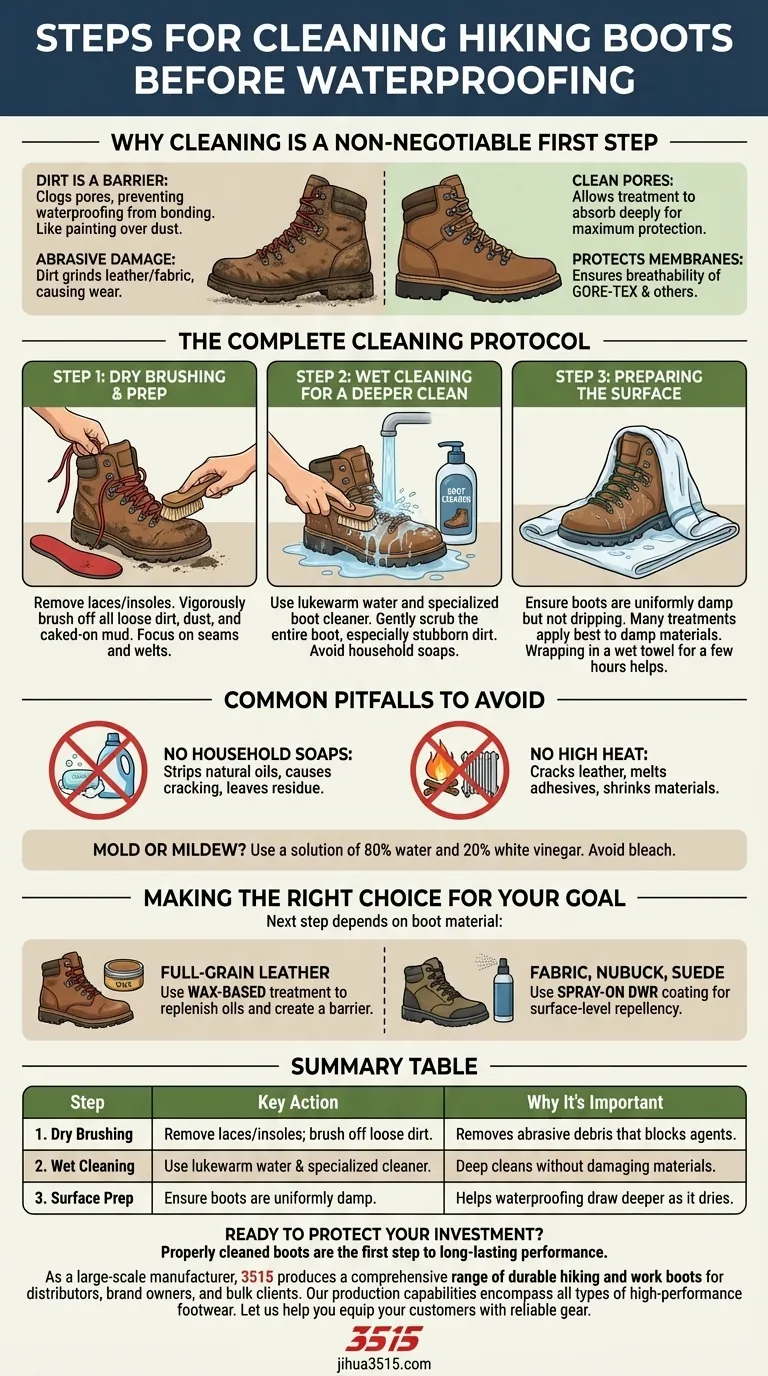
Why Cleaning is a Non-Negotiable First Step
Think of waterproofing as painting a wall. If you paint over a layer of dust, the paint will flake off. Similarly, applying a waterproofing treatment to a dirty boot means you're just coating the dirt, not the boot itself.
The Problem with Caked-On Dirt
Dirt and mud particles are highly abrasive. As you walk, they grind away at the leather or fabric, causing premature wear.
More importantly, dirt acts as a barrier. It clogs the pores of full-grain leather and the fibers of synthetic fabrics, preventing waterproofing agents from penetrating and bonding where they are needed most.
Protecting Waterproof Membranes
Many modern boots feature a waterproof, breathable membrane (like GORE-TEX). Dirt and grit can clog the membrane's microscopic pores from the outside, severely reducing its breathability and causing your feet to sweat.
The Complete Cleaning Protocol
Follow these steps precisely to prepare any hiking boot for a new coat of waterproofing. The key is to be thorough but gentle.
Step 1: Dry Brushing and Preparation
First, remove the laces and insoles from both boots. This allows you to access the entire tongue and interior and helps the boots dry faster later on.
Using a soft-bristled boot brush, vigorously brush off all loose dirt, dust, and caked-on mud. Pay special attention to seams, welts, and the area around the lace hardware, where debris loves to hide.
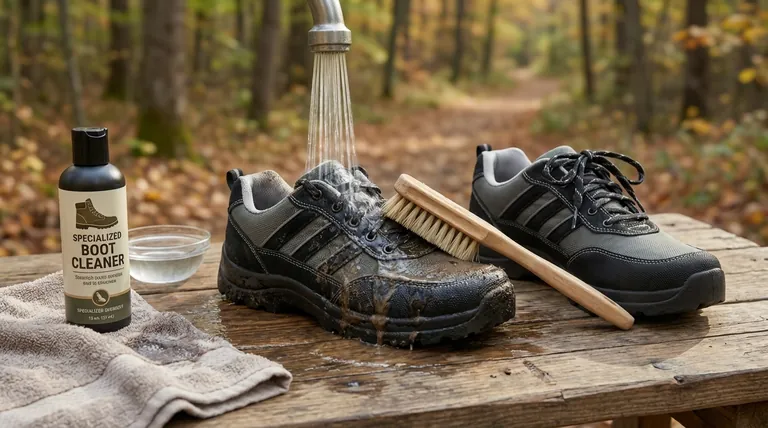
Step 2: Wet Cleaning for a Deeper Clean
With the loose debris gone, it's time for a wet wash. Use lukewarm running water and your brush to gently scrub the entire boot.
For stubborn, ground-in dirt, apply a specialized boot cleaner. This is crucial as these cleaners are formulated to clean effectively without damaging the boot's materials or any existing waterproof membranes.
Step 3: Preparing the Surface for Treatment
Once rinsed, the boots should be thoroughly damp but not dripping wet. Many modern waterproofing treatments are designed to be applied to damp leather or fabric, as this helps the treatment draw deeper into the material as it dries.
One effective method is to wrap the clean boots in a wet towel for a few hours. This ensures the entire boot is uniformly damp, creating the ideal canvas for the waterproofing application.
Common Pitfalls and What to Avoid
Proper cleaning is as much about what you don't do as what you do. Using the wrong products can cause irreversible damage.
The Danger of Household Soaps
Never use bar soap, dish soap, or laundry detergent. These products often contain additives and surfactants that can strip the natural oils from leather, causing it to dry out and crack. They can also leave behind a residue that clogs waterproof membranes.
High Heat is Your Enemy
Never dry your boots near a direct heat source like a campfire, radiator, or fireplace. Intense heat can crack leather, melt adhesives that hold the boot together, and cause the boot materials to shrink and deform.
How to Address Mold or Mildew
If your boots have developed mold, avoid harsh chemicals like bleach. Instead, create a solution of 80% water and 20% white vinegar. Use this mixture to gently scrub the affected areas before proceeding with the normal cleaning steps.
Making the Right Choice for Your Goal
Your next step depends on the boot's material, as this dictates the type of waterproofing treatment you will apply.
- If you have full-grain leather boots: Your primary goal is to replenish oils while creating a water barrier, so you will likely use a wax-based treatment.
- If you have fabric, nubuck, or suede boots: Your focus is on applying a surface-level Durable Water Repellent (DWR) coating, which is typically done with a spray-on product.
Properly cleaning your boots is the essential foundation for any successful waterproofing job.
Summary Table:
| Step | Key Action | Why It's Important |
|---|---|---|
| 1. Dry Brushing | Remove laces/insoles; brush off loose dirt and mud. | Removes abrasive debris that blocks waterproofing agents. |
| 2. Wet Cleaning | Use lukewarm water and a specialized boot cleaner. | Deep cleans without damaging materials or membranes. |
| 3. Surface Prep | Ensure boots are uniformly damp before treatment. | Helps waterproofing draw deeper into the material as it dries. |
Ready to protect your investment? Properly cleaned boots are the first step to long-lasting performance. As a large-scale manufacturer, 3515 produces a comprehensive range of durable hiking and work boots for distributors, brand owners, and bulk clients. Our production capabilities encompass all types of high-performance footwear. Let us help you equip your customers with reliable gear. Contact our team today to discuss your footwear needs.
Visual Guide
Related Products
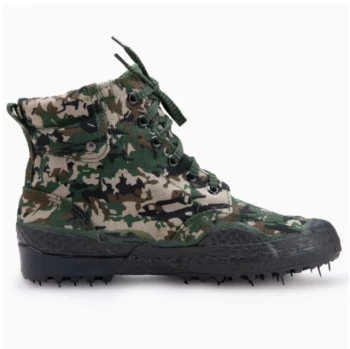
- Wholesale High-Traction Camo Boots - Custom Manufacturer for Brands
- Durable Rubber Sole Outdoor Shoes Wholesale & Custom Manufacturing
- Durable Spiked Camouflage Boots Wholesale & Factory Production
- Wholesale Lightweight Tactical Boots Custom Manufacturer for Desert & Combat Use
- Wholesale Waterproof Tactical Boots Custom Suede & High-Traction Soles
People Also Ask
- What should be considered when choosing between standard and air CAM boots? A Guide to Injury Recovery
- What is the technical logic behind using closed-eye testing for tactical boots? Unlocking Peak Footwear Stability
- What makes wide CAM boots different from standard CAM boots? A Guide to Choosing the Right Fit for Healing
- What are the advantages of custom-made work boots? Unlock Perfect Fit & Superior Durability
- Why is traction an essential feature in work boots? Prevent Slips and Ensure Workplace Safety