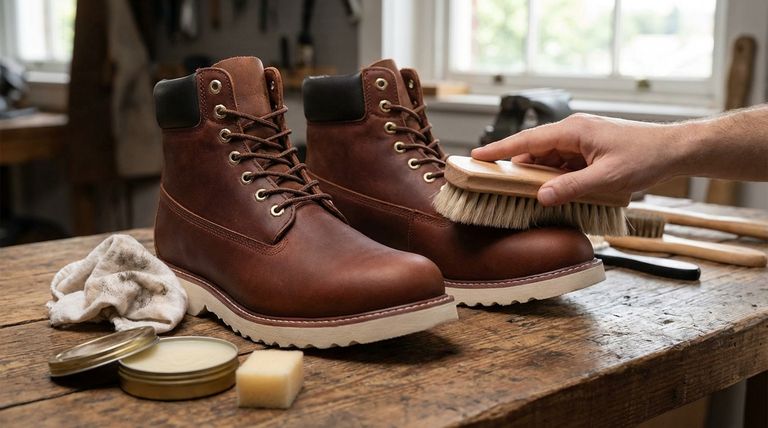
To properly clean leather cowboy boots, you must first remove all surface dirt with a brush, then wipe them down with a damp cloth. After letting them air dry completely away from direct heat, you must apply a leather conditioner in small, circular motions to restore moisture. Polishing is an optional final step for adding shine.
The goal of cleaning is not just to remove dirt, but to systematically restore the leather's essential moisture. Failing to properly dry and condition the boots after cleaning is the most common cause of cracking and premature aging.
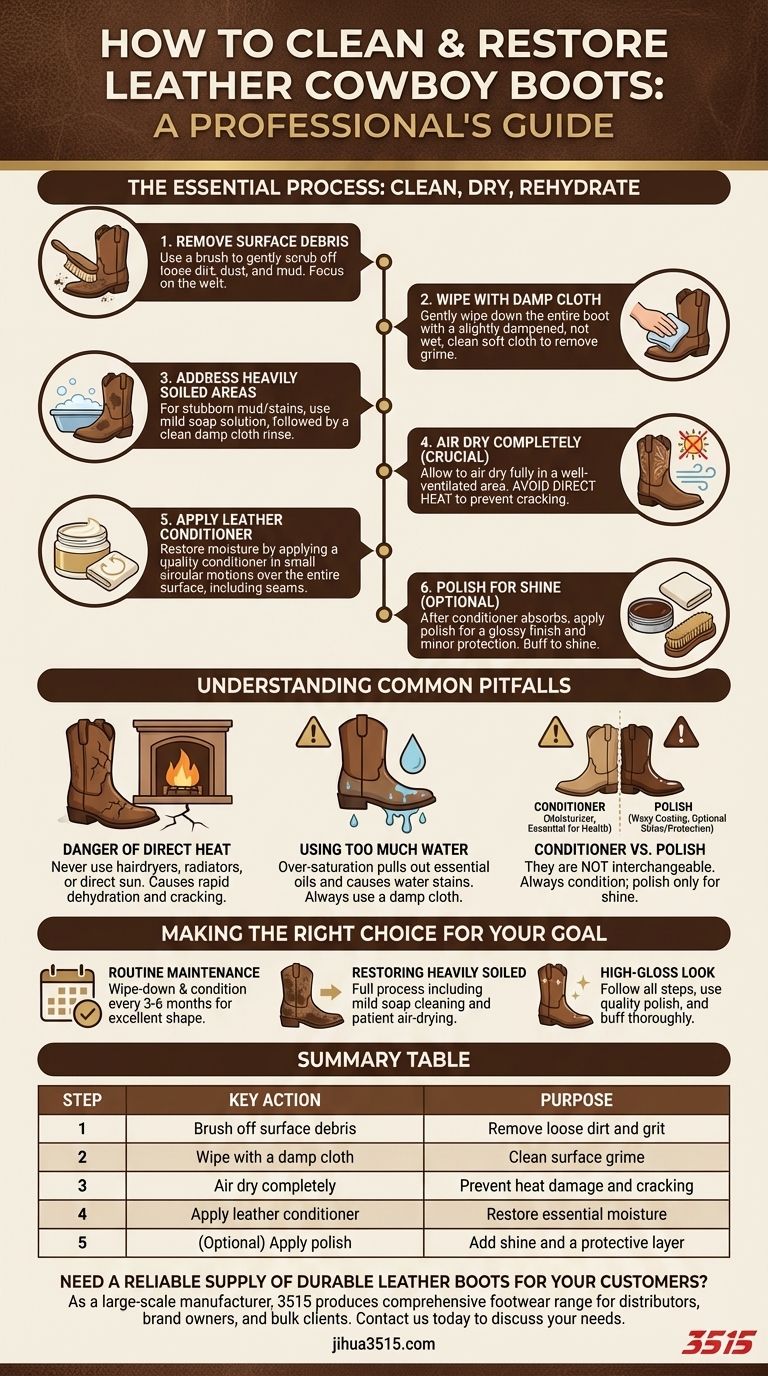
The Essential Cleaning and Restoration Process
Proper boot care is a multi-stage process that involves cleaning, drying, and rehydrating the leather. Each step is critical for preserving the material's strength and appearance.
Step 1: Remove All Surface Debris
Before applying any water or cleaner, you must remove all loose dirt, dust, and mud. Use a soft-bristled brush to gently scrub the entire surface of the boot, paying special attention to the welt where the sole meets the upper.
Step 2: Wipe Down the Leather
Slightly dampen a clean, soft cloth with water. Wring it out thoroughly so it is damp, not wet. Gently wipe down the entire boot to remove any remaining surface grime.
Step 3: Address Heavily Soiled Areas
For mud or stains that remain, you can use a solution of mild soap and water. Dip your cloth into the soapy water, wring it out, and gently rub the affected areas. Immediately follow with a different damp cloth (using only water) to rinse away any soap residue.
Step 4: Air Dry Completely
This is a non-negotiable step. Allow the boots to air dry completely in a well-ventilated area. It is crucial to keep them away from direct heat sources like sunlight, radiators, or vents, as intense heat will shrink the leather, causing it to become brittle and crack.
Beyond Cleaning: Conditioning and Protection
Once the boots are clean and dry, the most important phase begins: restoring the leather's natural oils.
Step 5: Apply Leather Conditioner
Put a small amount of a quality leather conditioner on a clean, dry cloth. Apply it to the boots using small, circular motions, ensuring you cover the entire surface evenly, including the seams. The conditioner soaks into the leather's pores, restoring the moisture lost during use and cleaning.
Step 6: Polish for Shine (Optional)
If you desire a glossy finish, you can apply leather polish after the conditioner has been fully absorbed. Use a separate clean cloth and apply the polish in the same circular manner. After it dries to a haze, use a clean brush or cloth to buff the boots to a shine.
Understanding the Common Pitfalls
Avoiding a few common mistakes is just as important as following the correct steps. Rushing the process or using the wrong materials can cause permanent damage.
The Danger of Direct Heat
Never use a hairdryer, place boots near a fireplace, or leave them in direct sun to speed up drying. This rapid dehydration is the single fastest way to destroy a pair of leather boots by making them crack.
Using Too Much Water
Over-saturating the leather can lead to water stains and can actually pull essential oils out of the material as it dries. Always use a damp cloth, never a soaking wet one.
Conditioner vs. Polish
These are not interchangeable. Conditioner is a moisturizer that is essential for the leather's health. Polish is a waxy coating that sits on the surface to provide shine and a minor layer of protection. Always condition; only polish if you want the shine.
Making the Right Choice for Your Goal
Your cleaning routine should match the condition of your boots and your desired outcome.
- If your primary focus is routine maintenance: A simple wipe-down with a damp cloth and conditioning every 3-6 months is sufficient to keep them in excellent shape.
- If your primary focus is restoring heavily soiled boots: You must follow the full process, including the mild soap cleaning, and be patient during the critical air-drying phase before conditioning.
- If your primary focus is achieving a high-gloss look: Follow all steps, ensuring you apply a quality polish and buff thoroughly after the conditioner has done its job.
Proper care is the simple commitment required to ensure your boots last for years to come.
Summary Table:
| Step | Key Action | Purpose |
|---|---|---|
| 1 | Brush off surface debris | Remove loose dirt and grit |
| 2 | Wipe with a damp cloth | Clean surface grime |
| 3 | Air dry completely | Prevent heat damage and cracking |
| 4 | Apply leather conditioner | Restore essential moisture |
| 5 | (Optional) Apply polish | Add shine and a protective layer |
Need a reliable supply of durable leather boots for your customers? As a large-scale manufacturer, 3515 produces a comprehensive range of footwear for distributors, brand owners, and bulk clients. Our production capabilities encompass all types of shoes and boots, ensuring quality and durability that stands up to proper care. Contact us today to discuss your footwear needs and discover how we can support your business with high-quality products.
Visual Guide
Related Products
- Durable Leather Work Boots for Wholesale & Custom Manufacturing
- Durable Leather Work Boots for Wholesale & Custom OEM Manufacturing
- Durable Leather Tactical Boots Wholesale & Custom Manufacturing for Brands
- Durable Leather Work Boots Wholesale Manufacturer & Custom Factory
- Wholesale Leather Work Boots with Customizable Wedge Sole for Brands
People Also Ask
- What are the advantages of leather versus synthetic work boots? A Guide to Choosing the Right Material
- Why is engineered foot support important in work boots? Prevent Injuries & Boost Productivity
- How can new work boots be broken in? A Step-by-Step Guide to a Pain-Free Fit
- What are the primary safety features of work boots? Essential Protection for Your Workplace
- What are the main factors to consider when selecting work boots? A Guide to Safety, Comfort & Durability