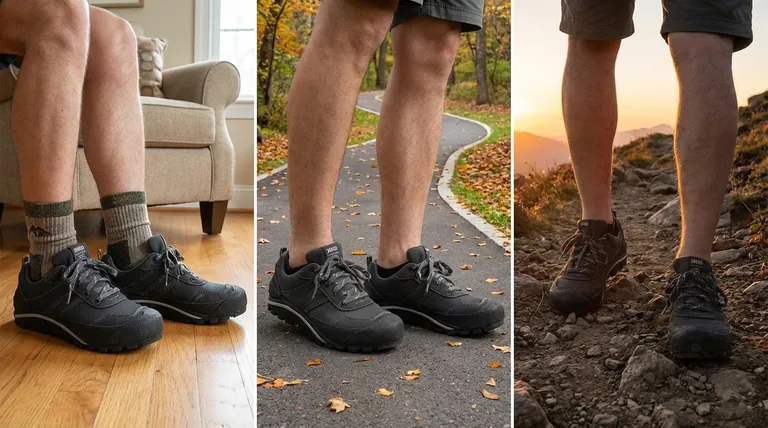
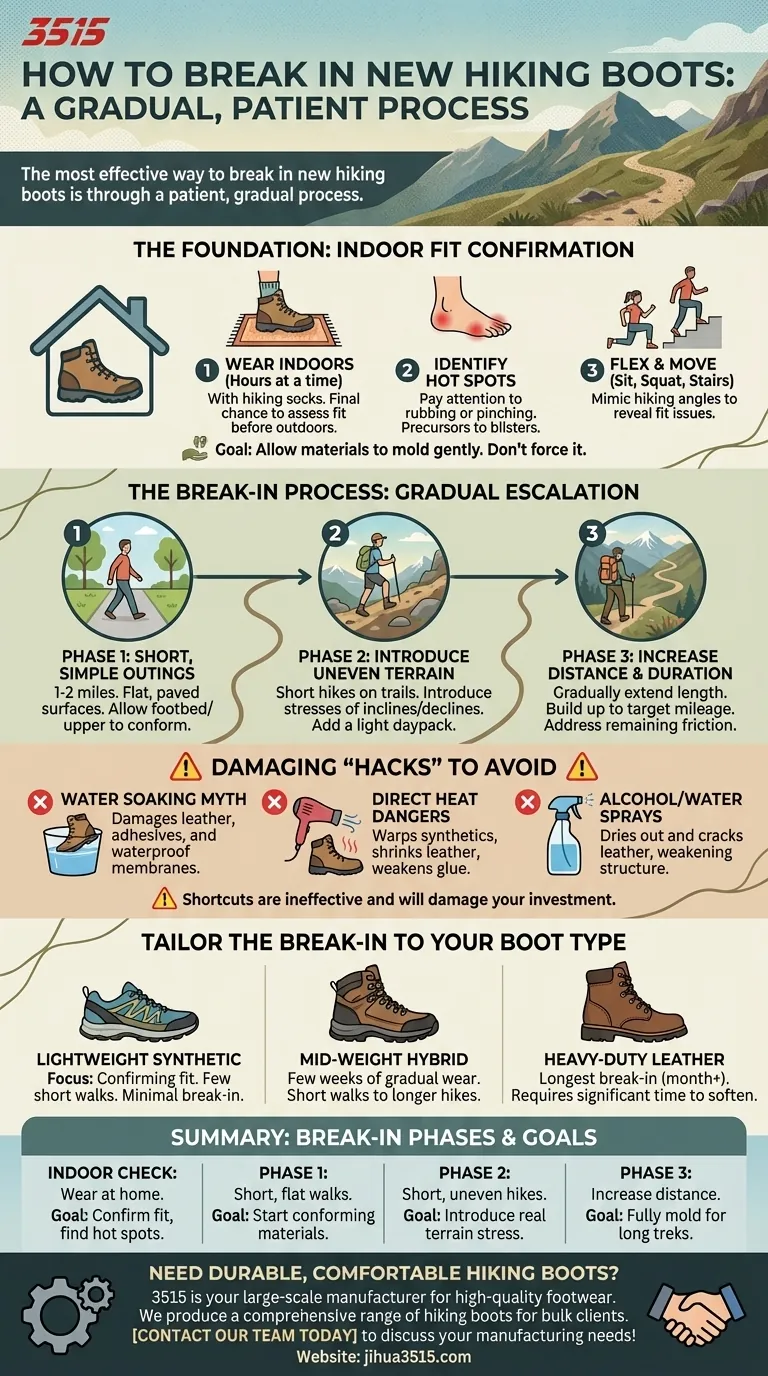
The most effective way to break in new hiking boots is through a patient, gradual process of wearing them in real-world conditions. Start by wearing them indoors to confirm the fit, then move to short walks on simple terrain, slowly increasing the distance, difficulty, and pack weight over several outings.
The goal is not to force a boot to fit, but to allow its materials to gently mold to the unique shape of your foot. Rushing this process with damaging "hacks" risks destroying your investment and causing serious discomfort on the trail.
The Foundation: Confirming the Fit Before You Begin
The break-in period is the final confirmation that you chose the right boot. If you experience significant pain or pinching from the start, the boot is likely the wrong size or shape for your foot, and no amount of breaking in will fix it.
Step 1: Wear Them Indoors
Before you even step outside, wear your new boots around the house for several hours at a time. Wear them with the same type of socks you plan to hike in.
This indoor phase is your final chance to assess the fit while keeping the boots pristine and eligible for return.
Step 2: Pay Attention to Your Feet
As you walk around, pay close attention to any areas of rubbing or pinching. These are known as hot spots and are the precursors to blisters.
Minor pressure is normal as the materials conform, but sharp or persistent pain is a major red flag.
Step 3: Flex and Move
Sit, squat, and walk up and down stairs if you have them. This mimics the different angles your foot will be in while hiking and helps reveal potential fit issues that standing or walking on a flat surface might not.
The Break-in Process: A Gradual Escalation
Once you've confirmed the boots feel good indoors, it's time to introduce them to the outdoors. The key is to increase stress on the boots—and your feet—incrementally.
Phase 1: Short, Simple Outings
Start with short walks around your neighborhood or a local park on paved or flat surfaces. Aim for a mile or two at first.
This allows the boot's footbed and upper to begin conforming to your foot's natural movement during a walking gait.
Phase 2: Introduce Uneven Terrain
Next, graduate to short hikes on actual trails with varied terrain. This introduces the stresses of inclines, declines, and uneven ground.
Adding a light daypack at this stage helps simulate real hiking conditions, as the added weight changes your posture and how your foot sits in the boot.
Phase 3: Increase Distance and Duration
Gradually extend the length and duration of your hikes. Your goal is to slowly build up to the mileage you plan to tackle on a typical long hike.
This final phase ensures the boots are fully molded and that you have identified and addressed any remaining friction spots before committing to a multi-hour trek.
Damaging "Hacks" and Myths to Avoid
You will find a lot of advice online promising to speed up the break-in process. Most of these shortcuts are ineffective at best and will actively damage the complex materials and construction of modern hiking boots.
The Water-Soaking Myth
Never soak your boots in water or wear wet socks to break them in. This can oversaturate and permanently damage leather, degrade the adhesives holding the boot together, and compromise the performance of waterproof membranes like Gore-Tex.
The Dangers of Direct Heat
Using a hair dryer or other heat source to soften boots is extremely risky. Excessive heat can warp synthetic materials, shrink leather, and weaken the cement that bonds the sole to the upper, causing delamination.
Why Alcohol and Water Sprays Are a Bad Idea
Spraying your boots with a mixture of rubbing alcohol and water is an old trick that can dry out and crack the leather. This permanently weakens the boot's primary structural material.
Making the Right Choice for Your Boots
The necessary break-in time depends heavily on the boot's construction. Tailor your expectations to the type of footwear you've purchased.
- If you bought lightweight synthetic trail shoes: Your focus is simply on confirming the fit over a few short walks, as their flexible materials require almost no break-in period.
- If you bought mid-weight leather and synthetic hybrid boots: Plan for a few weeks of gradual wear, moving from short walks to longer hikes to ensure the stiffer components mold properly.
- If you bought heavy-duty, full-grain leather boots: Be prepared for the longest break-in period, potentially over a month of consistent wear, as the thick, durable leather needs significant time to soften and conform.
Patience during the break-in process is your best insurance for countless miles of comfortable and blister-free hiking.
Summary Table:
| Break-in Phase | Key Activity | Goal |
|---|---|---|
| Indoor Check | Wear boots at home with hiking socks. | Confirm fit and identify hot spots. |
| Phase 1 | Short walks on flat, paved surfaces. | Allow materials to start conforming. |
| Phase 2 | Short hikes on uneven trails with a light pack. | Introduce stresses of real terrain. |
| Phase 3 | Gradually increase hike distance and duration. | Fully mold boots for long treks. |
Need durable, comfortable hiking boots ready for your next adventure? As a large-scale manufacturer, 3515 produces a comprehensive range of high-quality footwear for distributors, brand owners, and bulk clients. Our production capabilities encompass all types of hiking boots and shoes, designed for performance and built to last. Let us help you equip your customers with the perfect fit. Contact our team today to discuss your manufacturing needs!
Visual Guide
Related Products
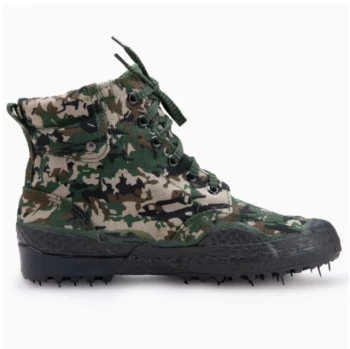
- Wholesale High-Traction Camo Boots - Custom Manufacturer for Brands
- Durable Rubber Sole Outdoor Shoes Wholesale & Custom Manufacturing
- Durable Spiked Camouflage Boots Wholesale & Factory Production
- Wholesale Lightweight Tactical Boots Custom Manufacturer for Desert & Combat Use
- Wholesale Waterproof Tactical Boots Custom Suede & High-Traction Soles
People Also Ask
- Why is traction an essential feature in work boots? Prevent Slips and Ensure Workplace Safety
- What is the technical logic behind using closed-eye testing for tactical boots? Unlocking Peak Footwear Stability
- What makes wide CAM boots different from standard CAM boots? A Guide to Choosing the Right Fit for Healing
- How does the Rank Score Test identify the primary causes of premature failure in tactical and work boots? Key Insights
- Are camo boots necessary for hunting success? Prioritize Performance Over Pattern