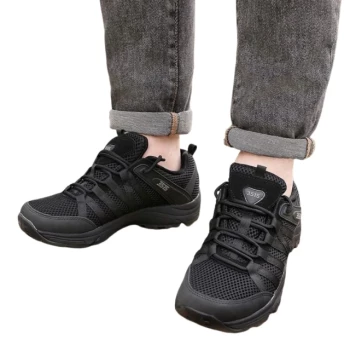
When your next multi-day hike depends on reliable footwear, standard shoe testing won’t cut it. Most trekkers check for basic comfort but overlook critical biomechanical factors that lead to blisters, swelling, and joint stress after miles of uneven terrain. Here’s how to simulate real trail conditions before your adventure—using methods derived from material science and kinesiology.
The Hidden Risks of Untested Trekking Shoes
Why Your Feet Swell Differently Than You Think
Feet expand up to half a shoe size during prolonged hiking due to fluid retention and tendon flexion. Standard "walk-around-the-store" tests fail because:
- Late-day swelling: Feet are smallest in the morning; test shoes after 4+ hours of activity.
- Heat activation: Friction from downhill hiking softens materials, altering fit.
Pro Tip: Wear the same socks you’ll use on trails and test shoes in the afternoon when feet are naturally enlarged.
The 15-Minute Re-Lacing Rule: More Than Just Tightness
Lace tension affects blood circulation and toe splay. Research shows:
- Over-tightened laces reduce midfoot flexibility, straining arches.
- Dynamic lacing (adjusting every 15 minutes during testing) mimics trail adjustments.
Try this: Walk uphill for 10 minutes, then re-lace to redistribute pressure before testing downhill stability.
Beyond the One-Hour Test: Simulating Real Trail Conditions
Gradient Impact Testing (Uphill/Downhill Simulation)
Flat-surface testing ignores the forces that cause toenail bruising and Achilles tension:
- Uphill: Shoes must prevent heel slippage. Test on a 15° incline for 20 minutes.
- Downhill: Toe box space should accommodate foot slide without jamming toes. Use a decline treadmill or stairs.
Key Finding: Sole rigidity should increase by ~30% on descents to stabilize joints.
Loaded Pack vs. Unloaded Walking Differences
A 20kg pack shifts your center of gravity, changing how shoes interact with terrain:
- Unloaded shoes feel roomier; loaded testing reveals pressure points at the metatarsals.
- Test with 75% of your planned pack weight for 1+ hour to identify hotspots.
Breaking-In as a Material Science Process
Membrane Flexibility vs. Sole Rigidity Balance
High-end trekking shoes combine stiff soles (for rock protection) with flexible uppers (for natural movement). During break-in:
- Phase 1 (0–20 miles): Focus on collar flexibility to prevent ankle rub.
- Phase 2 (20–50 miles): Sole compounds soften for better traction.
Note: Avoid shortcuts like soaking shoes—this weakens adhesive bonds.
Moisture-Wicking Liner Adaptation Stages
Synthetic liners require 3–5 wears to reach optimal wicking performance:
- Initial wears: Fibers align to reduce friction.
- After 8 hours: Microscopic pores open for faster evaporation.
Ready to Equip Your Next Adventure?
3515 Footwear specializes in biomechanically optimized trekking shoes for distributors and outdoor brands. Our OEM solutions integrate gradient-tested designs and adaptive materials—because every step should be as prepared as you are. [Contact 3515] to discuss custom footwear for your clients’ toughest trails.
Related Products
- Durable Rubber Sole Outdoor Shoes Wholesale & Custom Manufacturing
- Wholesale Durable Camouflage Canvas Shoes with High-Traction Cleated Rubber Sole
- Wholesale Durable Camo Canvas Shoes with High-Traction Rubber Soles
- Wholesale Waterproof Tactical Boots Custom Suede & High-Traction Soles
- Durable Leather High-Ankle Tactical Boots for Wholesale & Custom Manufacturing
Related Articles
- How Vulcanized Soles Became the Unsung Hero of Urban Footwear Culture
- How Vulcanized Soles Outperform: The Science of Durable Footwear Engineering
- Why Vulcanized Shoes Dominate Durability and Comfort: A Technical and Practical Guide
- Vulcanized Shoes Decoded: When They Shine and When to Choose Alternatives
- How Vulcanized Shoe Construction Delivers Unmatched Durability and Flexibility