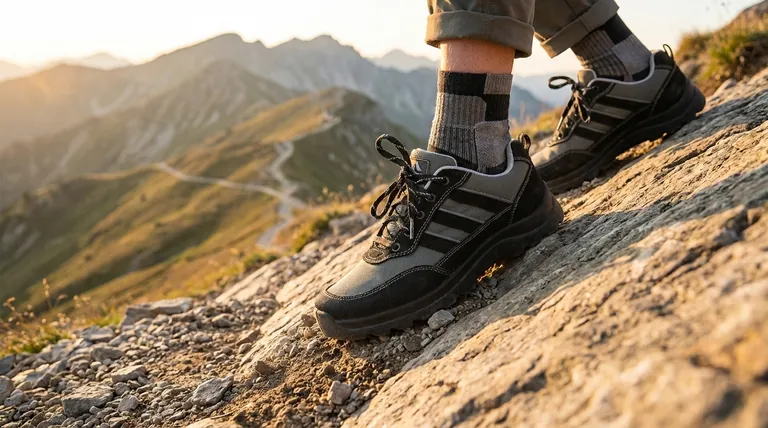
The definitive test for toe bang is to simulate walking downhill while wearing the shoes you intend to buy. With the boots laced up properly, find a ramp, a small set of stairs, or even a steep curb. As you walk down, your foot will naturally slide forward inside the boot. If your toes make any contact with the front of the shoe—even a light tap—the fit is incorrect and will likely cause significant pain on a real trail.
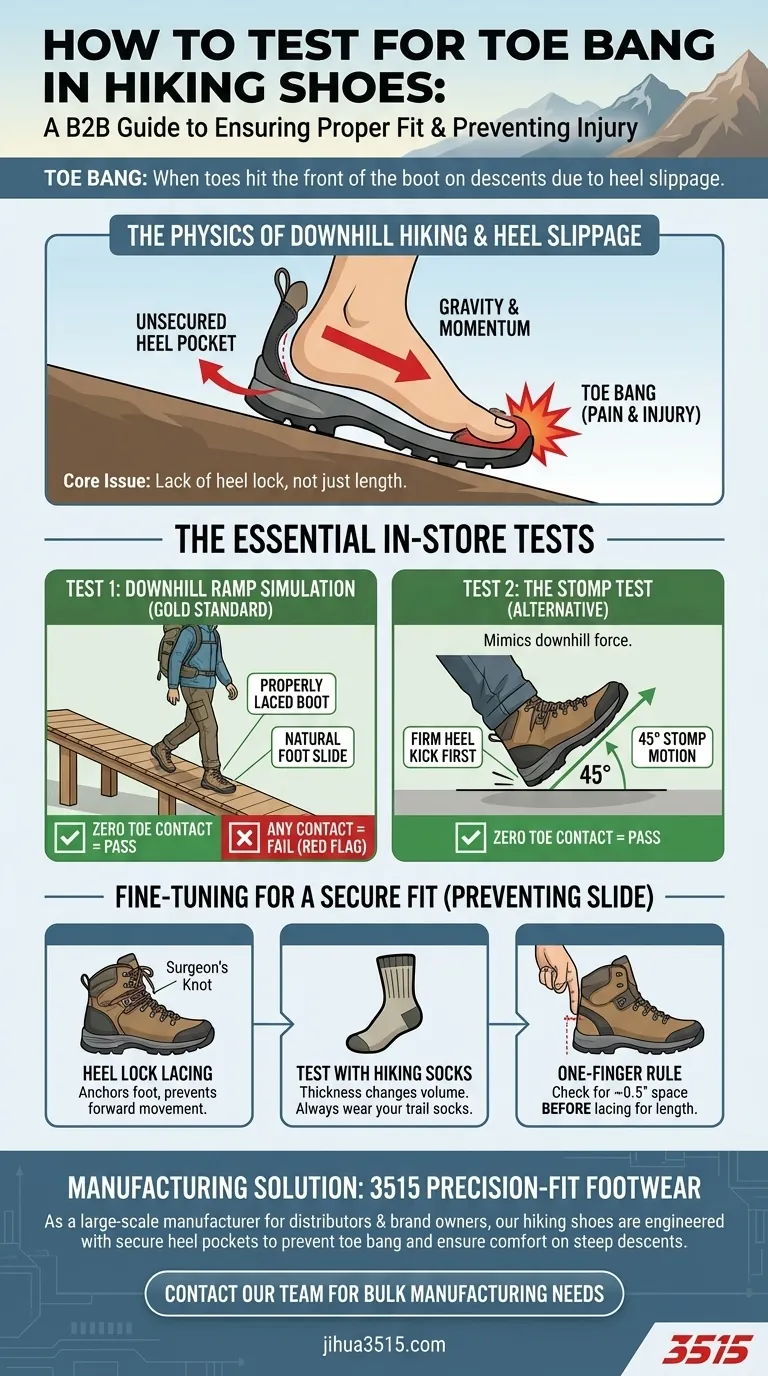
The core issue behind toe bang isn't just shoe length; it's about controlling foot movement. A proper fit must lock your heel into the back of the shoe, preventing your entire foot from sliding forward on descents. The downhill test is the only reliable way to verify this.
Why Toe Bang Happens: The Physics of Downhill Hiking
Gravity's Unwanted Push
When you walk downhill, gravity and your own momentum work together. This combination pushes your entire body forward and down, and that force is transferred through your feet.
The Failure of the Heel Pocket
A well-designed hiking boot has a "heel pocket" or "heel cup" shaped to hold your heel securely in place. If this area is too wide or shaped incorrectly for your foot, your heel will lift and your entire foot will slide forward with every downhill step.
When Toes Become Brakes
When your foot slides, something has to stop it. In a poorly fitting boot, your toes become the brakes, slamming into the hard front toe box. Repeated over thousands of steps, this impact bruises the toes and nailbeds, leading to the painful condition known as toe bang.
The Two Essential In-Store Tests
Test 1: The Downhill Ramp Simulation
This is the gold standard. Most dedicated outdoor retailers have a small ramp or set of stairs precisely for this purpose.
Lace the boots up snugly, as you would for a real hike. Walk down the ramp several times with normal strides. Pay close attention to sensation. You should feel absolutely no contact between the tips of your toes and the front of the boot.
Test 2: The Stomp Test (When No Ramp is Available)
If you can't find a ramp, you can perform a decent alternative test. Lace the boots up and kick your heel firmly against the floor a few times to seat it in the back of the boot.
Now, stomp your foot down at a roughly 45-degree angle, mimicking the motion of a hard downhill step. While less precise than a ramp, this will still generate the forward force needed to reveal if your foot is sliding. Again, any toe contact is a red flag.
Fine-Tuning Your Fit to Eliminate Sliding
The Critical Role of Lacing
Your laces are not just for tightening the boot; they are for securing your foot. A "heel lock" lacing technique, using a surgeon's knot near the ankle, can anchor your foot and prevent it from sliding forward even if the boot's volume is slightly large. This technique can often solve minor fit issues.
Always Test with Your Hiking Socks
The thickness of your sock dramatically changes the volume and fit inside a boot. Never test potential hiking footwear with thin, everyday socks. Always bring the specific pair of hiking socks you plan to wear on the trail to the store.
The One-Finger Rule
Before lacing up, slide your foot forward until your toes touch the front of the boot. You should be able to comfortably slide one index finger (about a half-inch of space) between your heel and the back of the boot. This confirms you have enough length to begin with before you test for forward-and-back slide.
Understanding the Trade-offs
The Risk of Sizing Up Too Much
The common advice to "size up" is a starting point, not a complete solution. If you choose a boot that is too large, you trade one problem for another. An overly large boot can cause severe heel blisters from slippage and a lack of control on uneven terrain.
Break-In vs. Bad Fit
Modern hiking boots require minimal break-in compared to old leather models. While the materials may soften slightly, the fundamental length and shape of the boot will not change. Never buy a boot that fails the toe bang test assuming it will "break in" to fit better later. It won't.
Making the Right Choice for Your Hike
- If your primary focus is flat or gently rolling terrain: You have more flexibility with fit, but the downhill test remains a vital check to ensure comfort on the occasional descent.
- If your primary focus is hiking in mountains with steep descents: A secure, locked-in heel and passing the downhill test with zero toe contact is non-negotiable. This should be your absolute top priority when selecting a boot.
- If you seem to be between sizes: Opt for the slightly larger size, but only if you can use specialized lacing techniques and appropriate socks to completely eliminate heel lift and forward slide.
A proactive fit test is the single best investment you can make in miles of pain-free hiking.
Summary Table:
| Test Method | How to Perform | What to Look For |
|---|---|---|
| Downhill Ramp Simulation | Walk down a ramp or stairs with boots laced properly. | Zero contact between toes and front of boot. |
| Stomp Test | Stomp foot at a 45-degree angle to mimic a downhill step. | Any toe contact is a red flag. |
| One-Finger Rule | Slide foot forward; check space behind heel. | About a half-inch of space for proper length. |
Ready to Source Perfectly Fitting Hiking Footwear?
As a large-scale manufacturer, 3515 produces a comprehensive range of footwear for distributors, brand owners, and bulk clients. Our production capabilities encompass all types of hiking shoes and boots, designed with the precise fit and secure heel pockets needed to prevent toe bang.
Let us help you provide your customers with durable, comfortable hiking footwear built for steep descents. Contact our team today to discuss your manufacturing needs and ensure a perfect fit for every hiker.
Visual Guide
Related Products
- Durable Rubber Sole Outdoor Shoes Wholesale & Custom Manufacturing
- Wholesale High-Traction Camo Boots - Custom Manufacturer for Brands
- Wholesale Durable Camouflage Canvas Shoes with High-Traction Cleated Rubber Sole
- Wholesale Durable Camo Canvas Shoes with High-Traction Rubber Soles
- Wholesale Breathable Perforated Leather Derby Shoes with Modern Comfort Sole
People Also Ask
- What factors should be considered when purchasing outdoor shoes? A Guide to Perfect Fit & Performance
- What are the recommended types of outdoor shoes for different activities? Find Your Perfect Fit for Any Terrain
- What are the risks of wearing outdoor shoes indoors? Protect Your Home's Health & Hygiene
- How is AI utilized in the design of outdoor and safety footwear? Harnessing Big Data for Market-Driven Shoe Innovation
- What are the drawbacks of wearing shoes indoors? Protect Your Home and Health from Hidden Contaminants