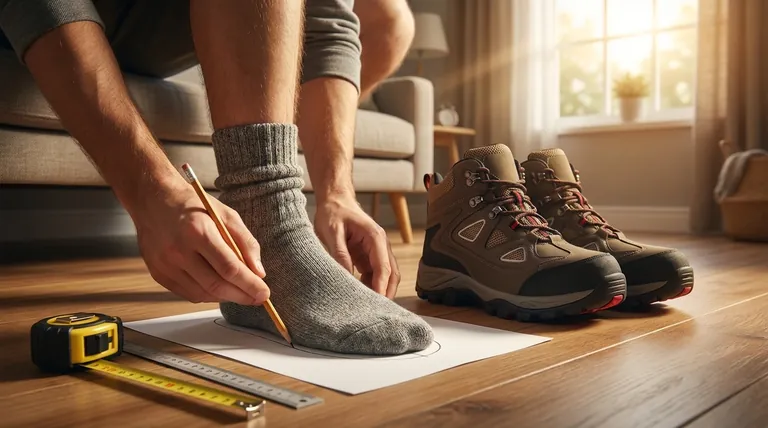
To measure your feet correctly, trace your foot on a piece of paper while standing and then measure the distance from the back of your heel to the tip of your longest toe. It's crucial to perform this measurement at the end of the day when your feet are at their largest and to use the measurement from your longer foot, as most people have one foot that is slightly bigger than the other.
The core challenge isn't just taking a measurement; it's understanding the environmental factors and anatomical nuances that affect foot size to get a consistently accurate reading for a proper shoe fit.
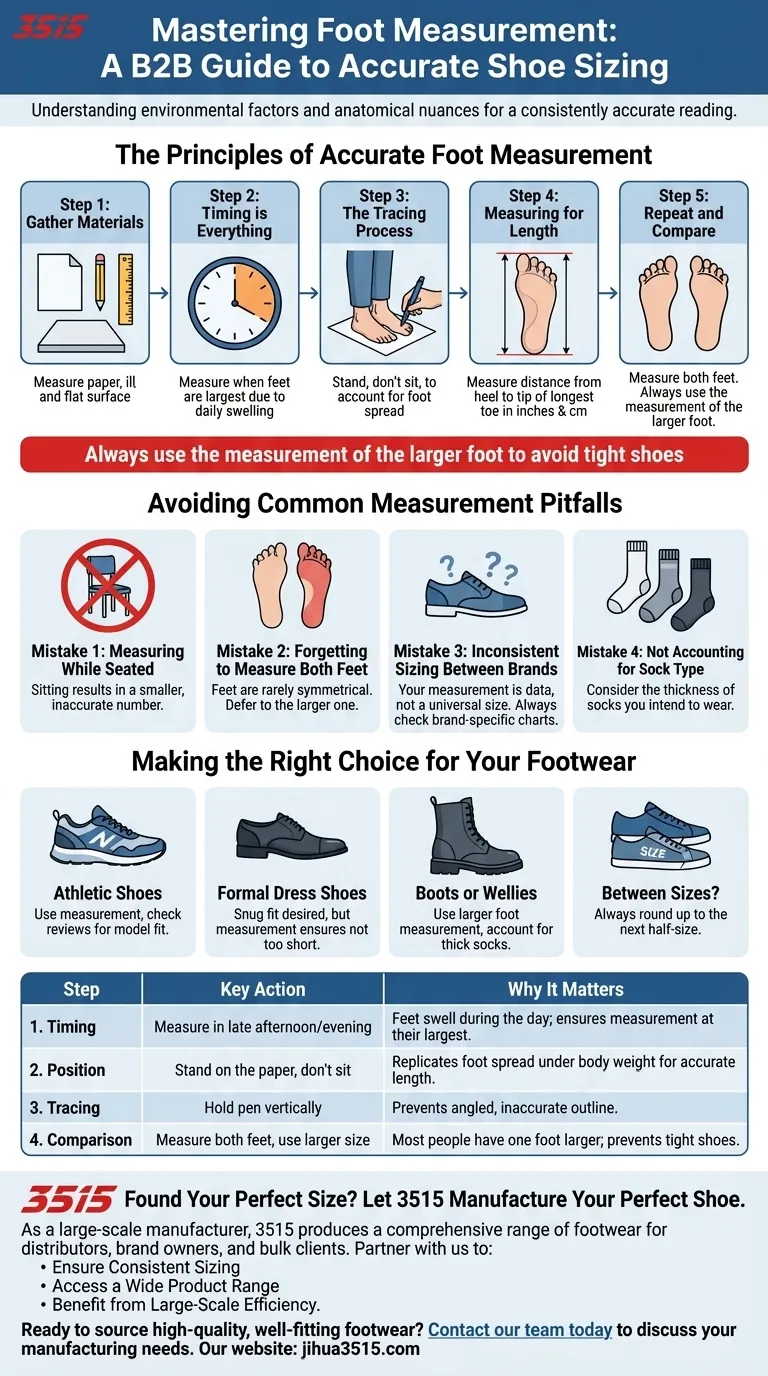
The Principles of Accurate Foot Measurement
To get a reliable measurement, you must account for how your feet change throughout the day and under pressure. This process is about capturing your foot's functional, load-bearing size, not just its passive dimensions.
Step 1: Gather Your Materials
You only need a few simple items: a piece of paper larger than your foot, a pen or pencil held vertically, a ruler or measuring tape, and a hard, flat surface.
Step 2: Timing is Everything
Measure your feet in the late afternoon or evening. Daily activity causes your feet to swell slightly, so measuring them at their largest point prevents you from buying shoes that feel too tight as the day progresses.
Step 3: The Tracing Process
Place the paper on a hard floor. Stand on the paper with one foot, ensuring your weight is distributed evenly. It's important to stand, not sit, as this flattens your foot to its true length.
Carefully trace the outline of your foot. Keep the pen or pencil perpendicular to the paper to avoid an inaccurate, angled tracing.
Step 4: Measuring for Length
Once you have the tracing, draw a straight line touching the very back of the heel and another straight line touching the tip of your longest toe. For many, this is the big toe, but it could be the second or third toe.
Use your ruler to measure the distance between these two parallel lines. Record this measurement in both inches and centimeters, as different brand charts may use different units.
Step 5: Repeat and Compare
Repeat the entire process for your other foot. It is extremely common for one foot to be slightly longer than the other.
Always use the measurement of the larger foot when comparing to a size chart. This is the single most important rule to avoid buying shoes that are too small.
Avoiding Common Measurement Pitfalls
A correct measurement is as much about avoiding mistakes as it is about following the steps. Small errors can lead to a size that is off enough to cause discomfort.
Mistake 1: Measuring While Seated
Sitting down does not replicate the way your foot spreads under your body weight. A seated measurement will almost always result in a smaller, inaccurate number.
Mistake 2: Forgetting to Measure Both Feet
Relying on a single foot's measurement assumes perfect symmetry that rarely exists. You must measure both and defer to the larger one.
Mistake 3: Inconsistent Sizing Between Brands
Your foot measurement is just a data point. It is not a universal shoe size. Always refer to the specific manufacturer's size chart before making a purchase, as sizing can vary significantly between brands.
Mistake 4: Not Accounting for Sock Type
Consider the thickness of the socks you intend to wear with the shoes. For hiking boots or winter footwear, you may need to account for thicker socks, which can impact the fit.
Making the Right Choice for Your Footwear
Use your measurement as a starting point, not a final answer. Combine this data with the context of the shoe you are buying.
- If your primary focus is athletic shoes: Use your precise measurement but read reviews about whether the model runs large, small, or true to size.
- If your primary focus is formal dress shoes: A snug fit is often desired, but your core measurement ensures you don't buy a shoe that is fundamentally too short.
- If your primary focus is boots or wellies: Use the larger foot's measurement and consciously consider the thickness of the socks you will be wearing with them.
- If your measurement falls between sizes: Always round up to the next half-size to ensure adequate room and prevent cramping.
Ultimately, an accurate measurement empowers you to make a more informed decision, dramatically increasing your chances of finding a comfortable and perfectly fitting shoe.
Summary Table:
| Step | Key Action | Why It Matters |
|---|---|---|
| 1. Timing | Measure in the late afternoon/evening | Feet swell during the day; this ensures you measure at their largest. |
| 2. Position | Stand on the paper, don't sit | Standing replicates the foot's spread under body weight for an accurate length. |
| 3. Tracing | Hold the pen vertically | Prevents an angled, inaccurate outline of your foot. |
| 4. Comparison | Measure both feet, use the larger size | Most people have one foot slightly larger; using the bigger measurement prevents tight shoes. |
Found Your Perfect Size? Let 3515 Manufacture Your Perfect Shoe.
As a large-scale manufacturer, 3515 produces a comprehensive range of footwear for distributors, brand owners, and bulk clients. Our production capabilities encompass all types of shoes and boots, from durable safety wear to stylish casual designs.
Partner with us to:
- Ensure Consistent Sizing: Leverage our expertise to provide your customers with reliably fitting footwear based on precise measurements.
- Access a Wide Product Range: We can manufacture the specific styles your market demands.
- Benefit from Large-Scale Efficiency: Get competitive pricing and reliable supply for your bulk orders.
Ready to source high-quality, well-fitting footwear? Contact our team today to discuss your manufacturing needs.
Visual Guide